


The ability that Sitecore Personalize has to deliver tailored customer experiences as part of a digital experience platform is largely founded on the ability to define and manage the conditions by which each audience receives their customized experience. Originally called “Audience Templates”, they’ve now been replaced by a new feature called “Conditions”. I strongly recommend reading Sitecore’s documentation on conditions, even if you’ve used their audience templates in the past, in order to discover how developers are using Sitecore Personalize conditions to turn complex code into a user-friendly interface for marketers.
What are Sitecore Personalize Conditions?
As a marketer, conditions are powerful, code-free ways to zero in on your targets for each experience or experiment in your Sitecore CDP or Sitecore Personalize instance. All past audience templates have been carried over to the new conditions formatting, so no manual transformation work is necessary to take advantage of the new features, such as enhanced testing capabilities.
To access your Sitecore Personalize conditions, click on the “Developer Center” dropdown at the top-right of your CDP or Personalize instance, then click on “Conditions”.
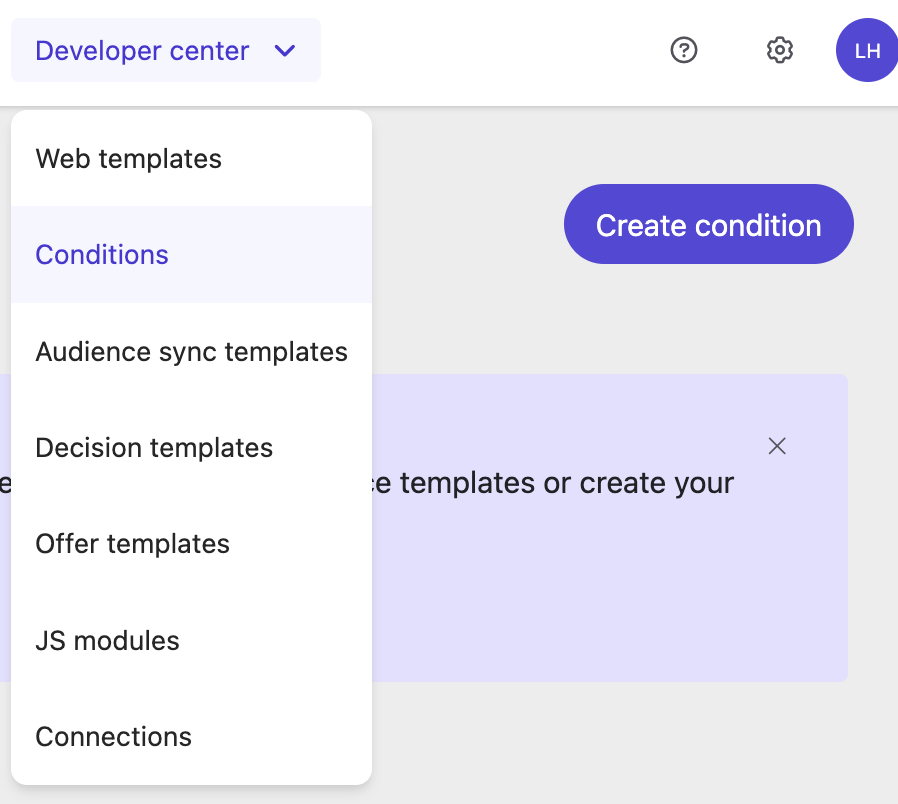
On the conditions screen, you’ll see each condition that has been created, its status, and last updated date, as well as filters such as publish date and status that let you use a faceted search to quickly find the condition you need.
Let’s look at a specific Sitecore Personalize condition and see how it looks. You can find additional information about out of the box conditions through Sitecore’s documentation here.
Day of the Week Condition
Clicking on the condition takes us to a screen which shows the code that powers the logic behind the condition. As a marketer, we’re concerned with the new testing capability, and where the condition is currently being used. Let’s check out the testing capabilities by clicking “Test” at the top-right. The modal below will be shown.

I’d like to test this condition to see what happens when I set it evaluate if it is currently a weekend day in my future experience or experiment. To do this, under the “Test scenario” tab, click on “Condition parameters”, then make sure “is” is selected from our condition logic dropdown, and select “Saturday” and “Sunday” from our day(s) of the week parameter. You can select multiple inputs to evaluate for each conditional parameter. You’ll also need a Guest to test the condition against. Be sure to select a Guest from the “Guest” tab by typing in either by their name, email, or guest reference ID.
Finally, you can optionally add additional parameters to an Experience request under the “Experience request” tab. If your condition is specific to a Point of Sale, or you’d like to add specific parameters to mimic session activities to test how they react to your condition logic, this is where you can add those values.
With your condition ready to test, click the “Test” button.
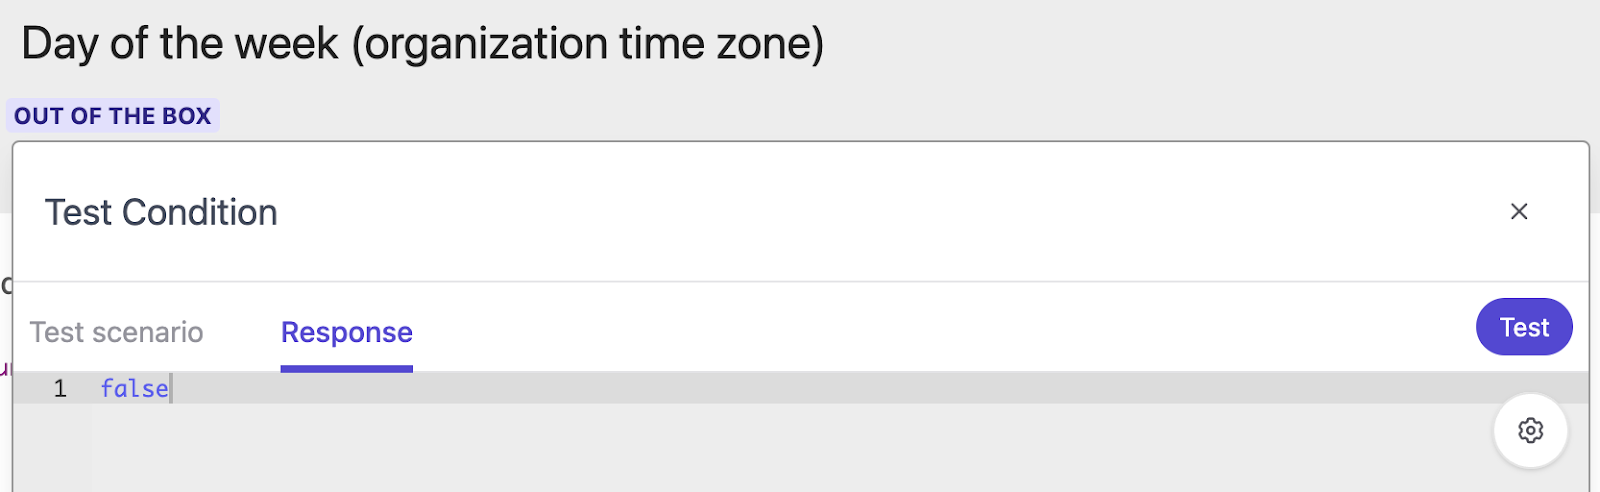
In my instance, it was currently a weekday, and thus the condition responded to our test with a response of “false.” Any experience or experiment we set to trigger based off a “true” response from this condition would not run.
Adding Conditions to Experiences
Now, let’s add this condition to one of our experiences that is not currently live. Keep in mind an experience must be paused or in the draft state to change its settings. In the experience, click on the “Add” button next to “Filter.” This brings up the screen that allows us to add our condition to the experience.
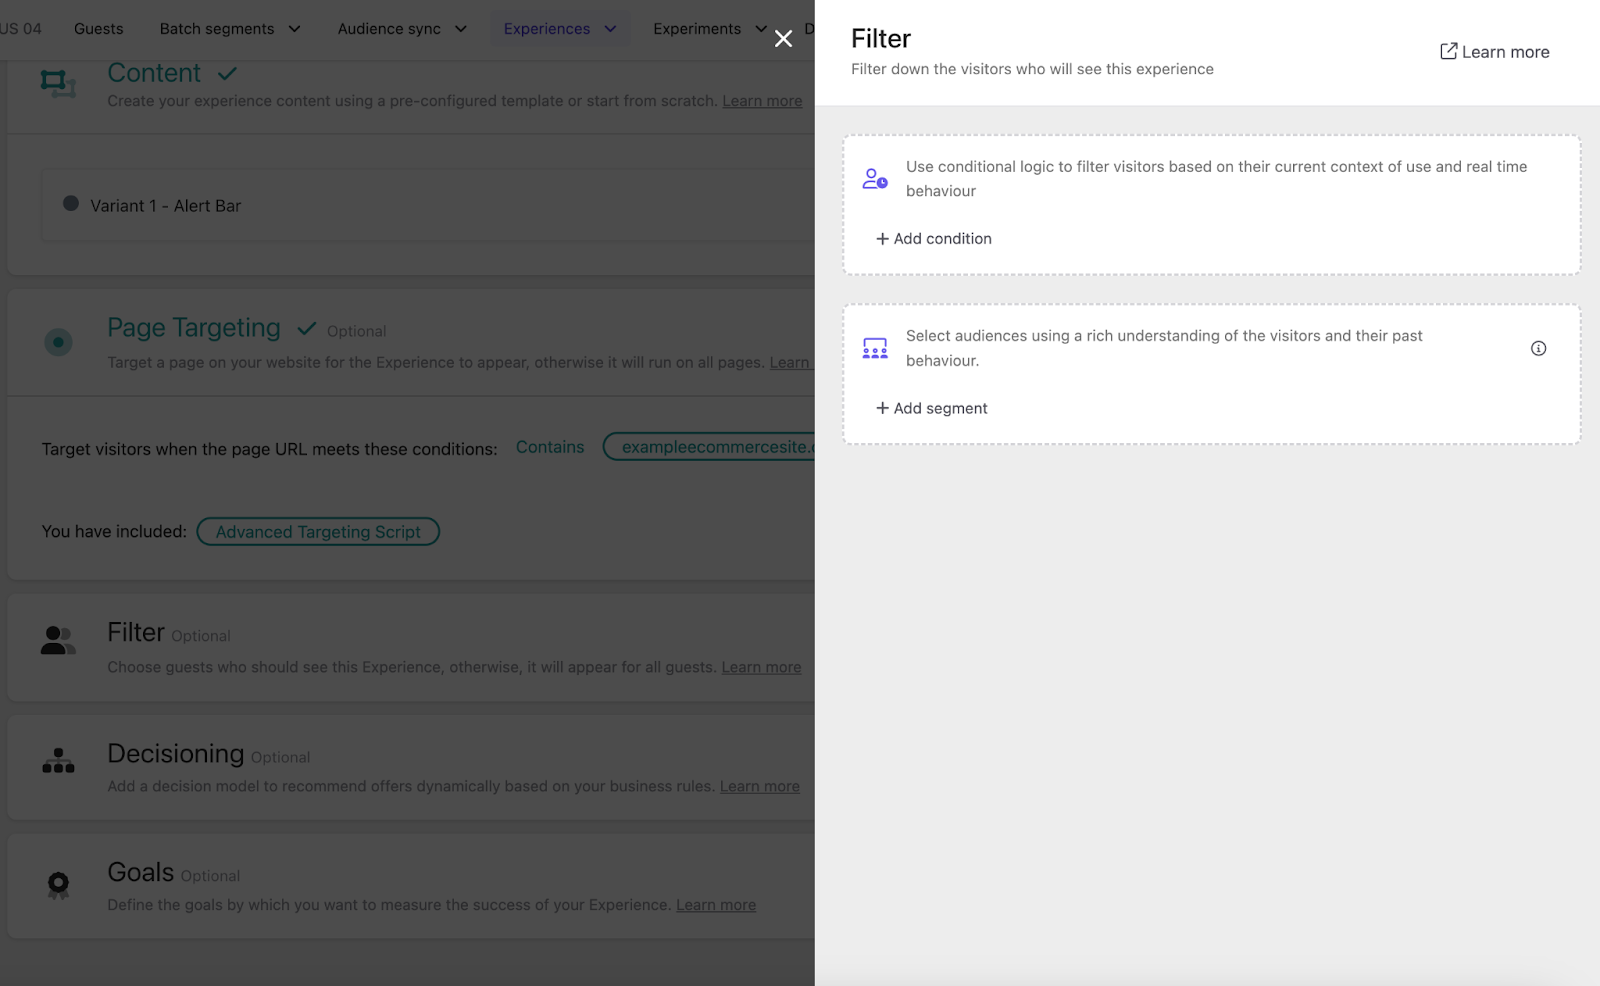
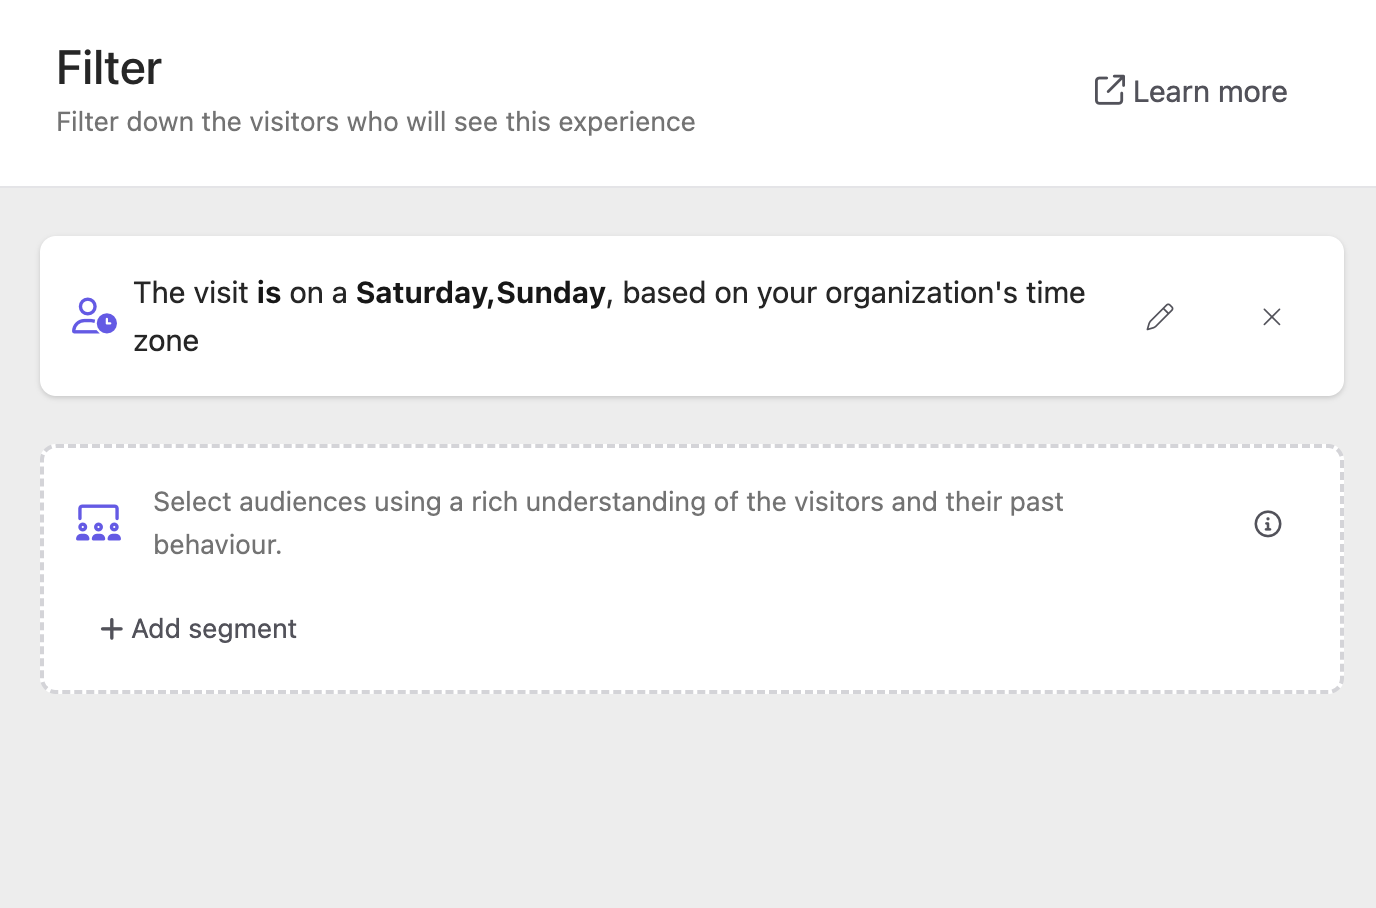
Clicking “+Add condition” will then let us select our day of the week condition. Once selected, we can then set the condition parameters to match our test scenario, where “is” is selected as the conditional logic and “Saturday” and “Sunday” are selected as the day of the week parameters, then click “Save”. Your condition should now be added to your experience. Keep in mind that only one condition can be applied to an experience or experiment.
Connect with a Sitecore MVP
Sitecore Personalize conditions are powerful, customizable ways to add easily transferable filters to apply across all of your experiences and experiments. For marketers, these represent easy ways to test and apply filters across all of your Sitecore Personalize features. For developers, these are powerful, customizable ways to enhance the work of your marketing teams, with a deep set of documentation. Let us know what some of your favorite segmentations using conditions are down in the comments below!
Maximize every experience across every channel with the leading experimentation and personalization platform. Our Sitecore MVP's are experts at optimizing Sitecore Personalize. If you're interested in learning more, contact us today.